


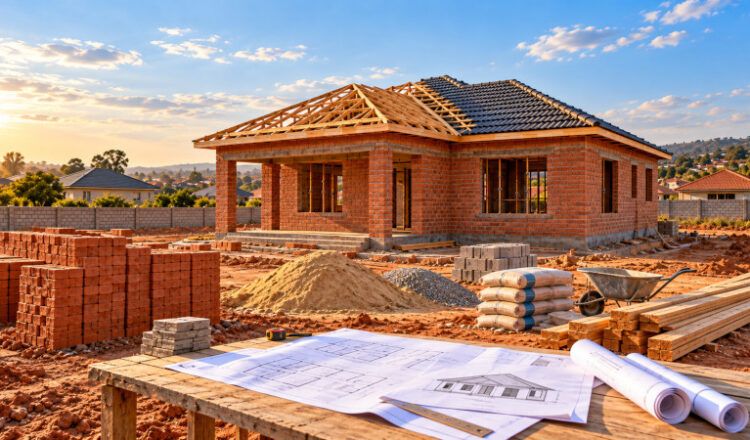
The Main Stages of Constructing a Single-Storey Residential House in Zimbabwe
Building a home is an exciting journey, but it can also feel overwhelming if you do not understand the construction process. For many homeowners in Zimbabwe, a residential project begins with a stand and a vision. However, between buying the land and receiving the keys to a completed home, there are several important construction stages that must be carefully planned, coordinated and supervised.
Understanding these stages can help you budget better, monitor progress more effectively and avoid costly mistakes. Below is a practical overview of the main stages involved in constructing a typical single-storey residential house in Zimbabwe.
1. Planning, Design and Approvals
Before any physical construction begins, the project must be properly planned. This stage usually includes:
- confirming ownership and development rights over the stand;
- appointing an architect or architectural designer;
- preparing the house plans;
- structural design where required;
- preparing cost estimates or a Bill of Quantities;
- obtaining the necessary approvals from the relevant local authority; and
- planning the construction programme and financing.
This stage is extremely important because mistakes made during planning often become expensive to correct once construction has started. The house design should take into consideration the size and shape of the stand, local authority requirements, orientation, drainage, future extensions and the homeowner’s budget.
A well-planned project starts with realistic drawings, realistic costs and a clear construction strategy.
2. Site Establishment and Setting Out
Once approvals are in place and construction is ready to begin, the site must be prepared. This may include clearing vegetation, removing unwanted material, establishing temporary storage areas and organising access for construction vehicles and materials.
The building is then set out on the ground. Setting out involves transferring the measurements from the approved drawings onto the actual stand so that the exact position of the house is established. This stage determines where walls, foundations and rooms will be located.
Incorrect setting out can create serious problems later, including boundary encroachments and incorrect room dimensions. It is therefore important that measurements are carefully checked before excavation starts.
3. Excavation and Foundation Works
The next stage involves excavating the foundation trenches according to the approved dimensions and required depths. The type and depth of foundation will depend on factors such as soil conditions, structural requirements and the design of the house.
Typical foundation works may include:
- excavation of foundation trenches;
- compaction of the trench bottoms;
- laying concrete footings;
- construction of foundation walls;
- installation of foundation reinforcement where specified; and
- preparation for the floor slab.
Foundations are one of the most critical parts of any building. Once a house has been constructed, foundation problems can be extremely expensive and difficult to correct. This is why proper workmanship, correct materials and professional supervision are essential at this stage.
4. Backfilling and Compaction
After the foundation walls have been completed, the area inside the foundations is filled with suitable material. The filling must be placed in appropriate layers and properly compacted. Poor compaction can cause the floor slab to settle or crack in the future.
Depending on the design and site conditions, this stage may also involve hardcore filling, sand blinding and preparation for damp-proofing. Particular care should be taken in areas with problematic soils.
5. Damp-Proofing and Floor Slab
Before the floor slab is cast, measures are taken to protect the house from moisture rising from the ground. This commonly involves installing a damp-proof membrane beneath the slab and a damp-proof course within the walls. Plumbing pipes and other services that need to pass beneath the floor may also be installed at this stage.
The concrete floor slab is then cast and properly cured. Good preparation at this stage helps reduce future problems such as dampness, cracking and underground plumbing alterations.
6. Walling Up to Roof Level
Once the floor slab and foundation works are complete, construction of the external and internal walls begins. Depending on the design, walls may be constructed using common bricks, cement blocks or other approved building materials.
Door and window openings are formed as walling progresses. Lintels are installed above openings, and the walls are raised to the required height. This is often one of the most visible and exciting phases for homeowners because the shape of the house begins to become clearly recognisable. Rooms, passages, bathrooms and other spaces become physically defined.
7. Ring Beam and Roof Preparation
Depending on the structural design of the building, a reinforced concrete ring beam may be constructed at wall plate level. The ring beam helps tie the walls together and can improve structural stability.
Roof preparation then begins. This may include:
- installation of wall plates;
- preparation of roof trusses;
- checking roof levels;
- installation of roof trusses; and
- bracing of the roof structure.
The roof structure must be properly designed and installed because it carries significant loads and protects the building from weather.
8. Roofing
Once the roof structure is complete, the roofing material is installed. Common roofing options in Zimbabwe include:
- concrete roof tiles;
- metal roofing sheets;
- stone-coated roofing tiles; and
- other approved roofing systems.
Roofing works may also include installation of ridges, flashings, gutters and downpipes. At this point, the building becomes increasingly protected from rain and other weather conditions. Proper roof installation is important to prevent leaks, water penetration and future damage to ceilings and finishes.
9. Installation of Windows and External Doors
The next stage involves securing the building. Window frames and external door frames may be installed earlier during wall construction, depending on the construction method. Final windows, doors and glazing can then be fitted.
Once the building can be securely closed, internal finishing work becomes easier and building materials can be better protected. Security considerations are especially important on construction sites where theft of fittings and materials can occur.
10. First-Fix Plumbing and Electrical Installation
Before internal plastering and finishing, plumbers and electricians install the concealed services.
Electrical first-fix (Stage 1) works may include:
- conduit installation;
- wiring routes;
- switch and socket positions;
- distribution board preparation; and
- provision for lighting points.
Plumbing first-fix (Stage 1) works may include:
- hot and cold water pipes;
- drainage pipes;
- bathroom connections;
- kitchen connections; and
- geyser or water-heating connections.
This work should follow the approved electrical and plumbing layouts. It is important to think carefully about where sockets, switches, lights, taps and appliances will be located before walls are closed and finished. Changing them later may require breaking completed plaster and tiles.
11. Plastering and Internal Wall Finishes
Once major concealed services are in place, internal and external plastering can begin. Plaster provides a smooth and protective finish to the walls and prepares them for painting or other decorative finishes.
External finishes may vary depending on the architectural design and can include:
- plaster and paint;
- face brick;
- stone cladding;
- textured finishes; or
- a combination of materials.
Quality workmanship is especially important because poor plastering can lead to uneven walls, cracks and visible imperfections after painting.
12. Ceiling Installation
Ceilings are installed after the roof is secure and the relevant electrical preparation has been completed. Common ceiling systems may include gypsum boards, plasterboard or other decorative ceiling materials.
The ceiling stage may also include:
- cornices;
- ceiling insulation;
- access panels;
- lighting openings; and
- decorative ceiling features.
The ceiling has a major impact on the final appearance of a home.
13. Floor and Wall Tiling
Once plastering and major wet works have progressed, tiling can begin.
Waterproofing is particularly important in bathrooms, showers and other wet areas. The floors have to be prepared as rough floors to ensure efficient tile fitting. The quality of tiling depends heavily on proper preparation, accurate setting out and careful workmanship. Poorly installed tiles can result in uneven surfaces, hollow tiles and unnecessary future repairs.
14. Joinery and Cabinetry
This stage includes the installation of fitted cupboards and other timber or manufactured joinery elements.
These may include:
- kitchen cupboards;
- bedroom wardrobes;
- vanity units;
- shelving;
- internal doors; and
- skirting.
Joinery contributes significantly to both the functionality and appearance of the house. It is advisable to finalise colours, materials and layouts early enough to avoid delays.
15. Stage 2 Plumbing and Electrical Works
After most internal finishes are complete, the final plumbing and electrical fittings are installed.
Electrical stage 2 items may include:
- switches;
- sockets;
- light fittings;
- distribution boards; and
- final appliance connections.
Plumbing second-fix items may include:
- toilets;
- basins;
- showers;
- mixers;
- taps;
- sinks; and
- geysers or water-heating systems.
These items should be tested before the project is considered complete.
16. Painting and Final Finishes
Painting is normally carried out towards the final stages of construction. Walls should be properly prepared before paint is applied. The finishing stage may include:
- internal painting;
- external painting;
- decorative finishes;
- polishing or sealing of surfaces;
- fitting of door handles and locks; and
- minor touch-ups.
This is the stage where the house begins to achieve its final appearance.
17. External Works
A house is not complete simply because the building itself is finished.
External works may include:
- driveways;
- paving;
- boundary walls;
- gates;
- stormwater drainage;
- sewer connections;
- water connections;
- landscaping;
- septic systems where applicable; and
- external lighting.
In many Zimbabwean developments, external infrastructure conditions differ from one area to another, so these works should be planned according to the location of the stand.
18. Inspections, Testing and Snagging
Before handover, the completed works should be carefully inspected. Snagging involves identifying minor defects or incomplete items that need correction.
These may include:
- leaking taps;
- faulty electrical points;
- paint defects;
- cracked tiles;
- poorly fitted doors;
- incomplete finishes; or
- damaged fittings.
Plumbing and electrical systems should be tested. Where necessary, relevant local authority inspections and completion requirements should also be addressed.
A project should not be considered fully complete simply because it looks finished. Proper testing and inspection are essential.
19. Final Cleaning and Handover
Once all outstanding items have been completed, the house is cleaned and prepared for occupation. The client should receive all relevant documents, warranties, certificates and other project records where applicable.
Keys are then handed over.
For most homeowners, this is the most rewarding stage of the entire construction journey. The drawings and plans that once existed only on paper have become a completed home.
Build With Confidence With Novus Habitat Africa
At Novus Habitat Africa, we understand that building a home is more than a construction project. It represents years of planning, savings and personal ambition. Whether you already have approved plans, are still developing your design, or are considering building from the diaspora, our team can help you navigate the construction journey from concept to completion.
We can support you with the coordination of design, budgeting, project management, contractor supervision, construction and the various stages required to turn your vision into a completed home.
Instead of managing multiple contractors and suppliers on your own, you can work with a trusted construction partner who understands the Zimbabwean building environment.
Planning to build your home in Zimbabwe?
Engage Novus Habitat Africa for your construction and project management needs and let us help you move confidently from the first drawing to the final handover.
Novus Habitat Africa — From Vision to Home. Call/App +263 712 042 248
Leave a Comment